

Facebook Business Manager Setup
In the previous article we reviewed a free way of promoting on Facebook — through a Facebook page. Now it is time to look at how we can improve our free promotion by adding some paid ads to our marketing strategy. But before publishing paid ads we need to setup Business Manager. Facebook Business Manager is a tool where you can create, edit, assess Facebook ads as well as manage your work with Facebook Pages.
In this article we will examine each step of Facebook Business Manager setup and will overview which tabs you will need to use as a beginner. The most important parameters which we will need to set in order to have a fully packed Business manager are a Facebook Page, an Ad Account and a Payment method. These aspects are essential for creating ads.
Setup
 First of all, you need to create a Facebook page as you will have to associate your Ad Account to the page. You can find the guide on how to create a page in this article. You will need a page in any case if you want to create ads.
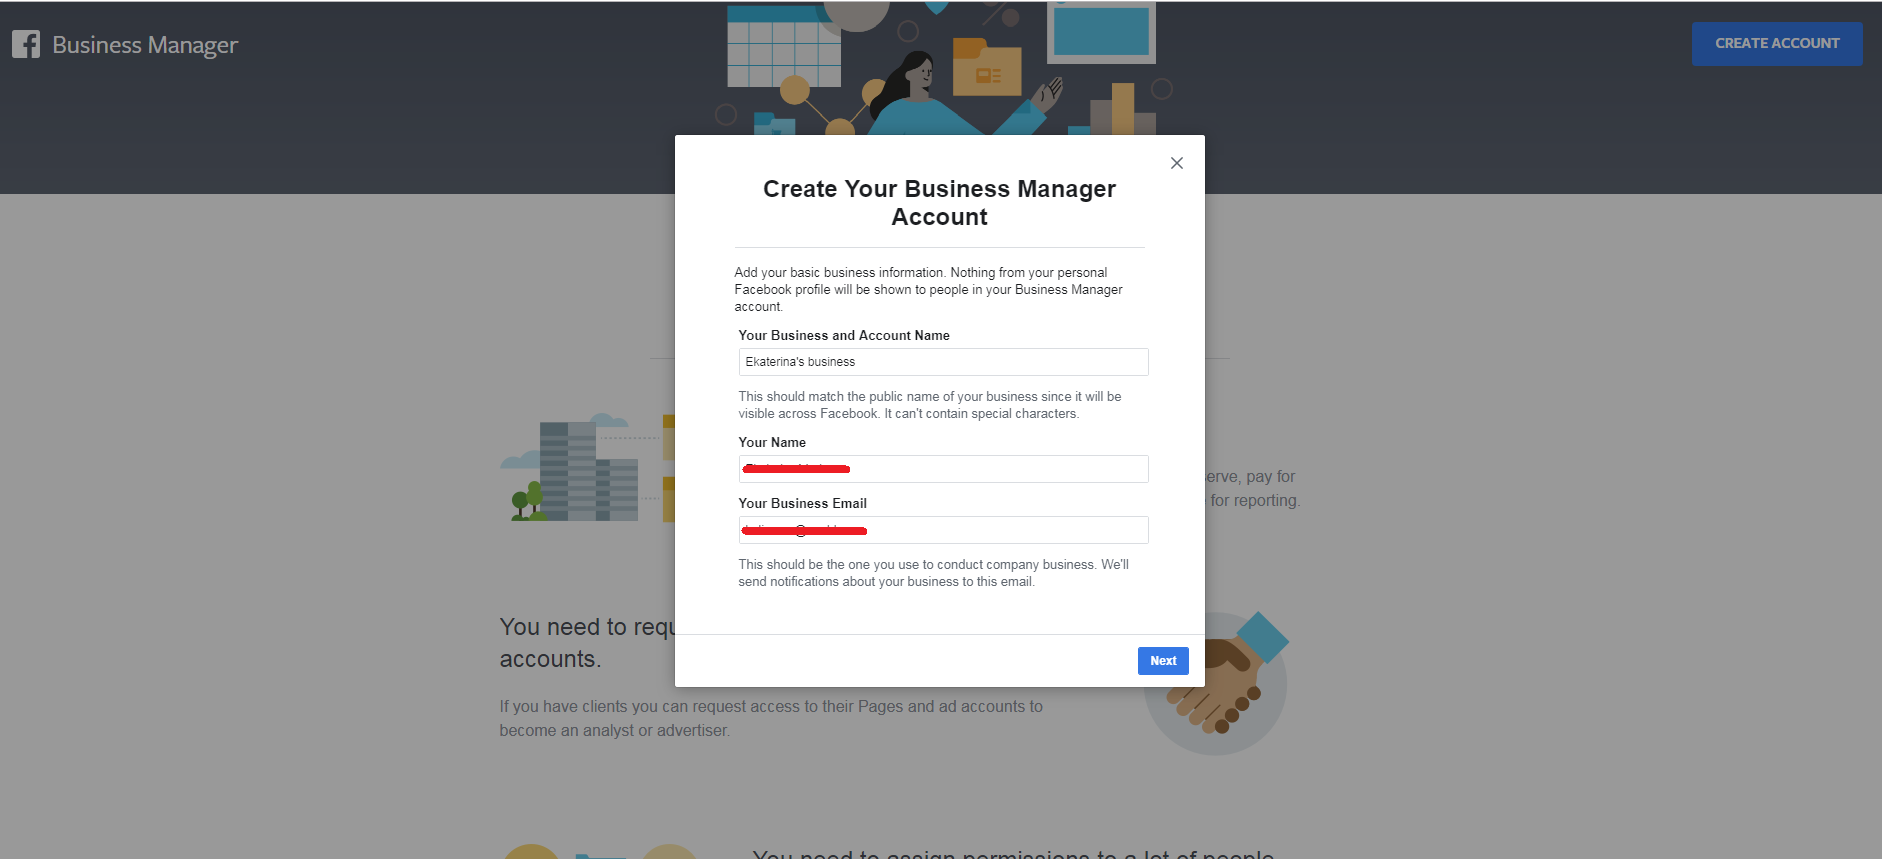
Then you should create a Business Manager Account. Let’s do it through this link. We proceeded to the main page of Business Manager, here you can read some general information about this tool and then press the blue button in the top right corner “Create Account”. A pop-up window will appear where you will need to enter some basic information. Name your account in accordance with your business. After that, you’ll have to add the business details. Keep in mind that if you want to keep working with this account, it is better to provide valid information.
As soon as you’ve inserted all the information, you’ll be transferred to the home page of the Business manager and there you will see many tabs and sections. Some of them you will use later, but not all.
Ad Account creation
Now we need to create an ad account in order to promote products and make ads. Here is how it is done:
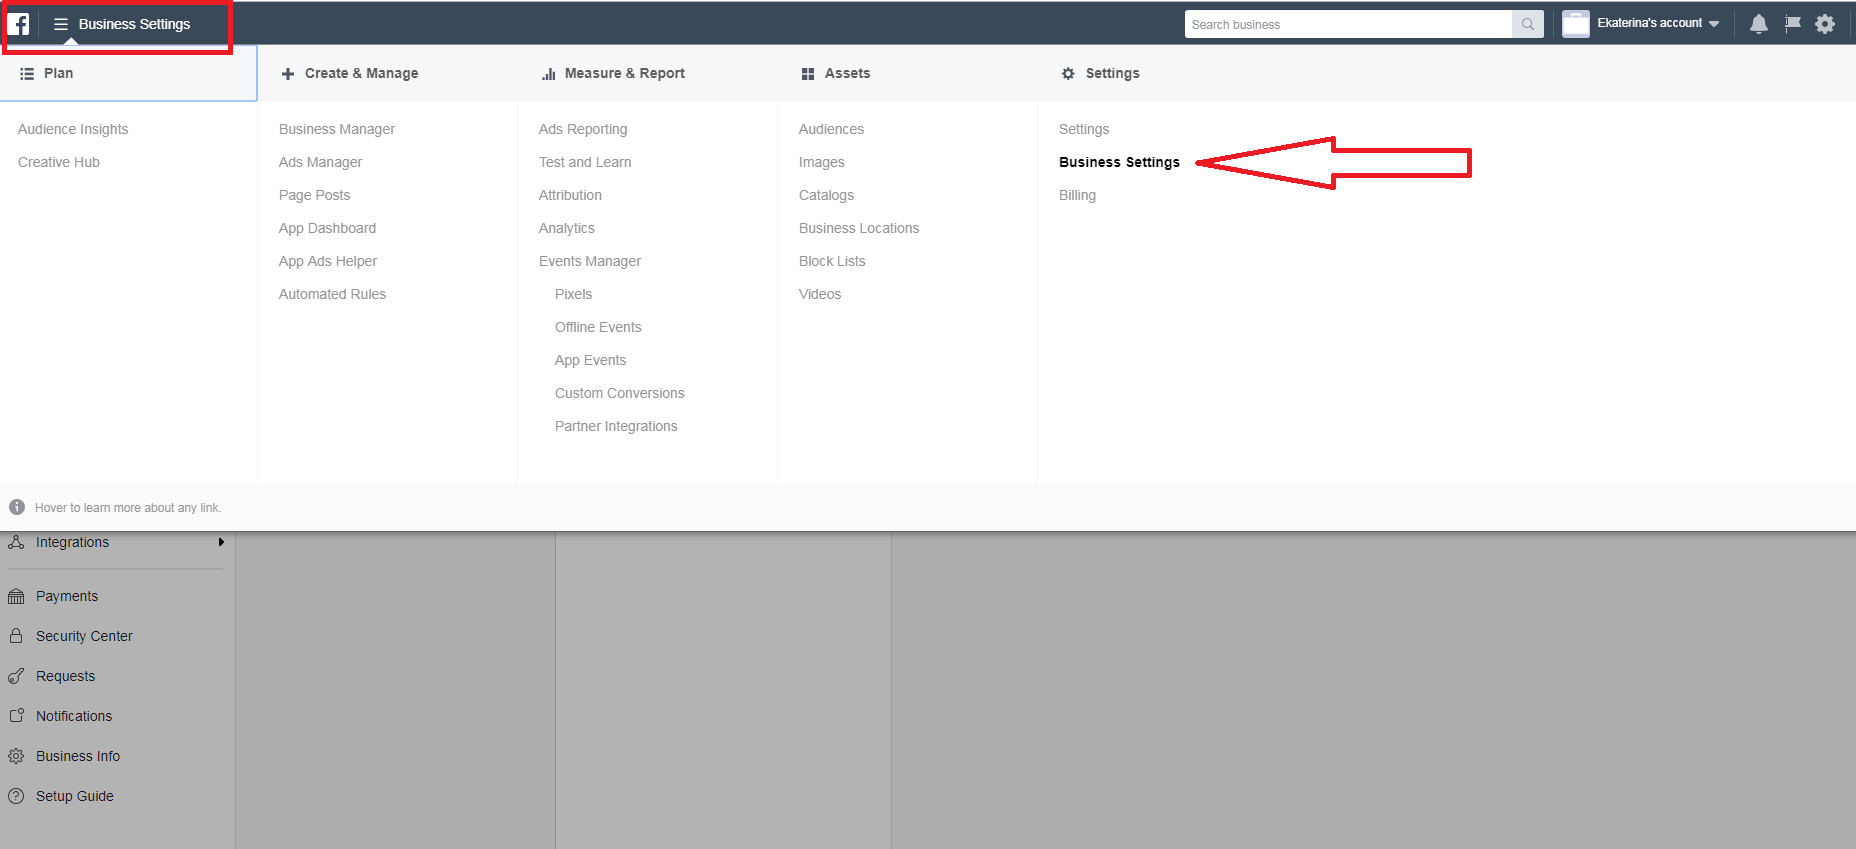
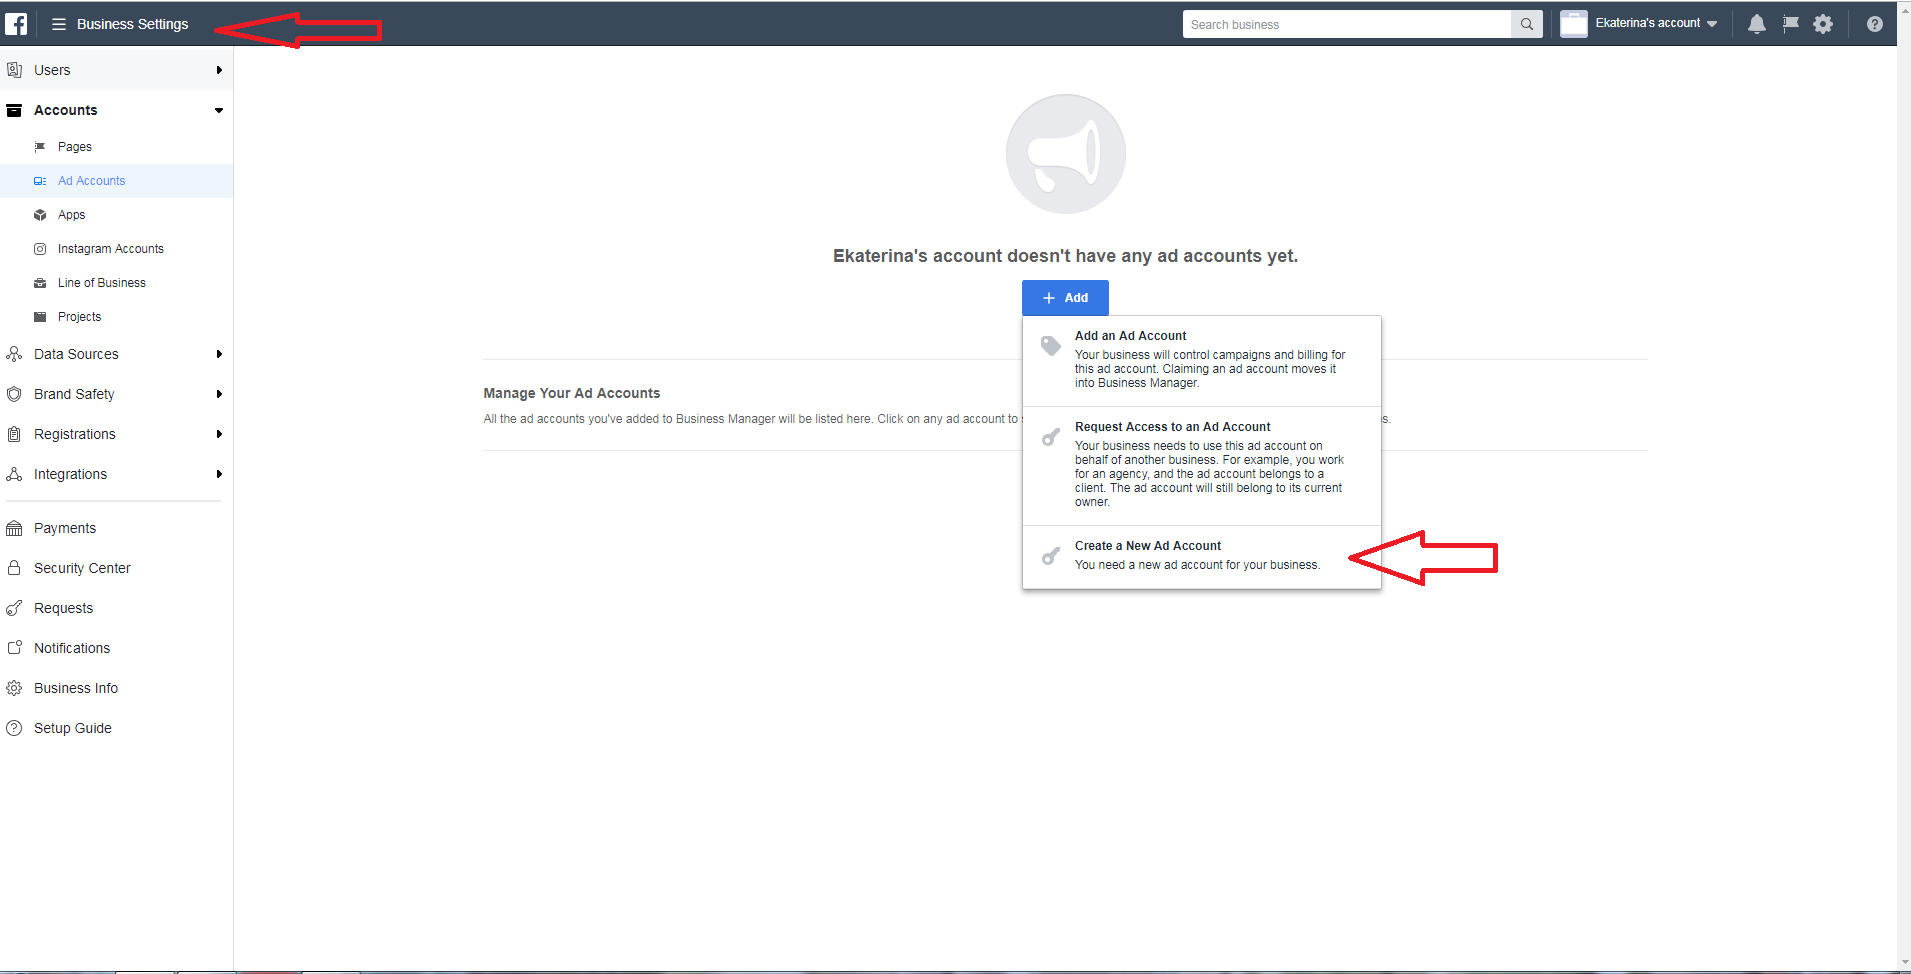
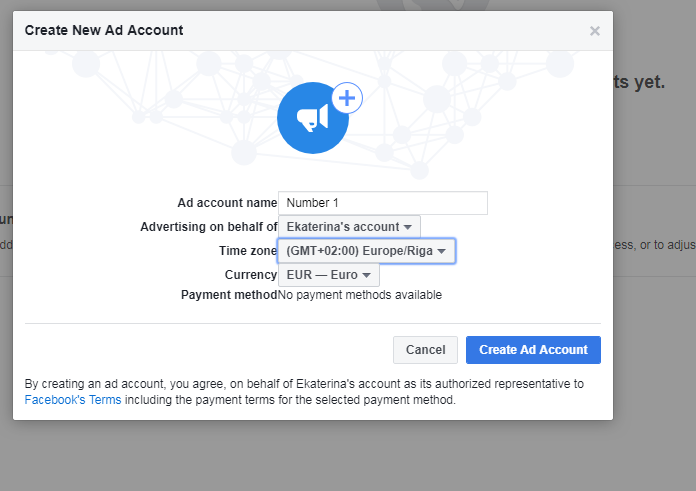
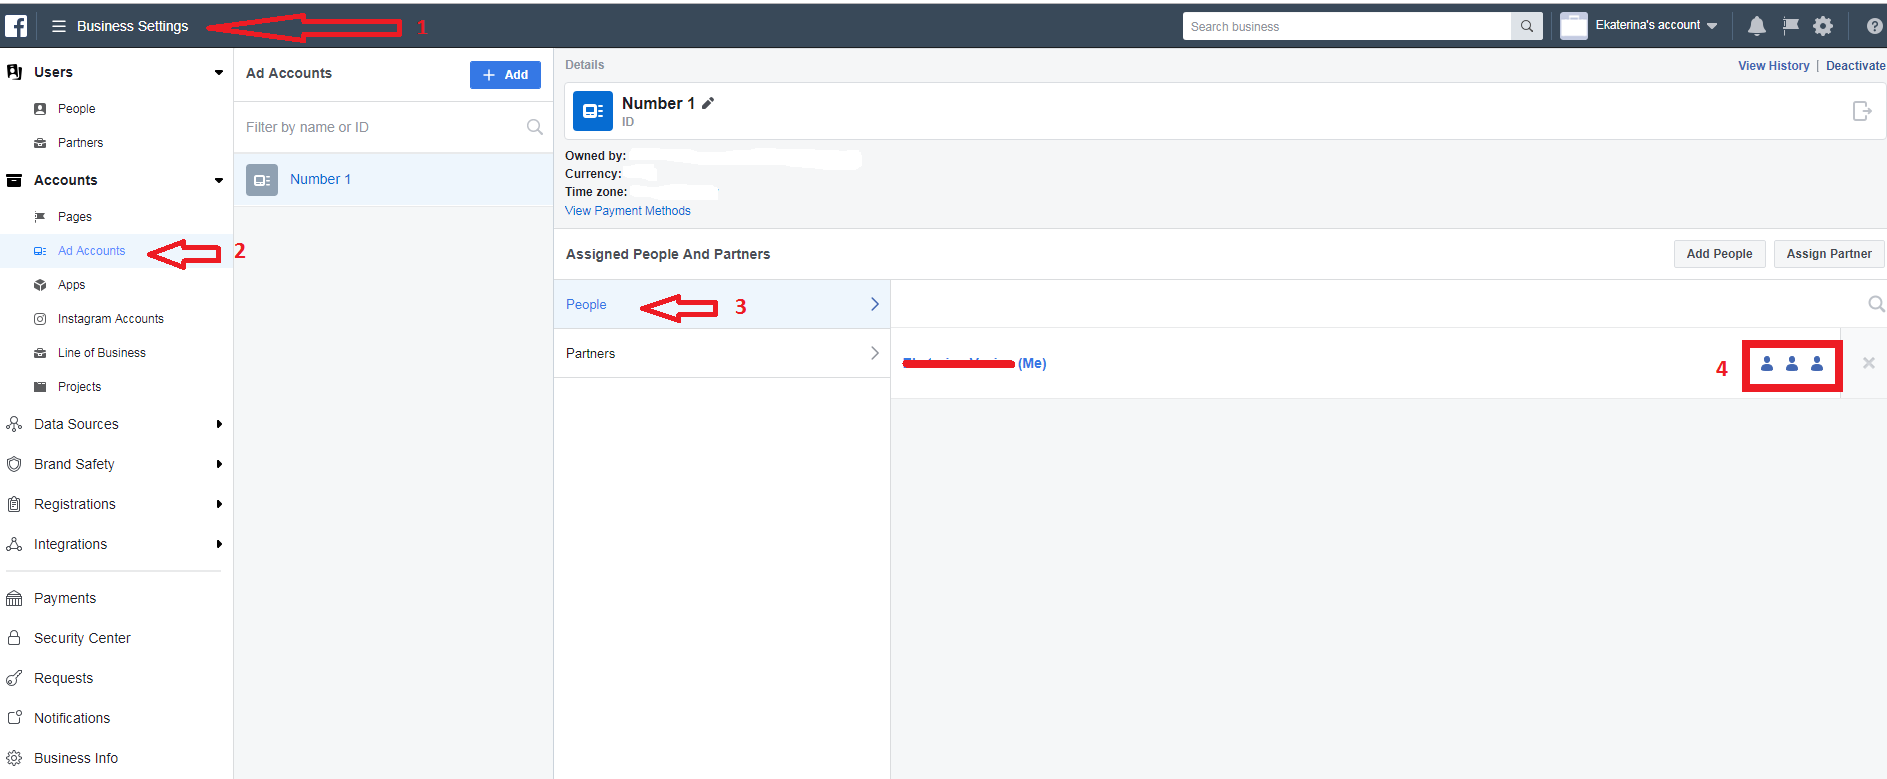
As we don’t have any accounts yet, let’s create a new one. Click on 3 stripes in the left top corner and then on the tab “Business Settings” to make an account. Create a name for the account so that you will be able to distinguish them if you have many. In our case, it will be an account Number 1. Then indicate the information (time zone, currency) correspondent to your business. For example, if you live in Germany and will make ads for this region (or any European country where the currency is Euro), indicate the currency EUR as all future transactions will be carried out in Euro (payments for ads). After clicking on “Create account”, you will see a pop up where you will need to assign yourself as an Admin of the ad account as it will let you perform any actions and check statistics of ads.
There are several page roles which you can always manage in the section “Business settings”. You can both change the roles of people who work with an ad account or a page. The ad account roles which exist:
 Ad Account Analyst. The person can view only ad performance.
Ad Account Advertiser. The person can edit and set up ads using the payment method associated with the ad account.
Ad Account Admin. This person can perform any actions, including editing the billing details, assigning roles and creating reports.
Payment method setup
Then we need to add the payment method. It is in the section settings – payment settings. As we don’t have any method yet, we need to create a new one. Having clicked on “add payment method” you will see an appeared pop up where you will need to fill in all the information. Check the box accepting that you will be running ads for business purposes or on behalf of a business and then move on.
At the next step, you will be able to select one payment method (credit or debit card, PayPal or Facebook Ad Coupon). If you want to use PayPal or you have a Facebook Ad Coupon, choose those options, but we are going to use a bank card. Having inserted all bank card details, press “Continue”. It can take several minutes till the process will be finished.
Keep in mind that all changes regarding the ad account, acount roles, associated pages should be done in the section “Business settings”. You can also add there new partners if you want to allow several people to have access to your account and to work in it. If you want to link your Instagram account to Facebook to manage everything at one place, it should be also done in “Business settings”.
Additional features
We have finished setting up the important parameters of Business Manager: Ad Account, Page, Payment method. Now let’s take a quick look at what else useful we can find.
Audience insights. It is a section on Facebook Business Manager where you can find any type of audience you want. The search opportunities are so well-developed that you can find a target audience for almost any category of goods. Here you can conduct experiments and set any needed audience characteristics: age, gender, education, relationship status, location, interests and so on. If you click on “Advanced”, you will also get an opportunity to select audiences upon their
job titles, market segment, life events, political views, parenthood, and so on. When selecting or removing various parameters, you will see on the right that the demographic information about the users will change accordingly. There you will see which pages the selected audiences like, where they are and their activity. Having set all the necessary parameters, you can save the audience or create an ad for it.

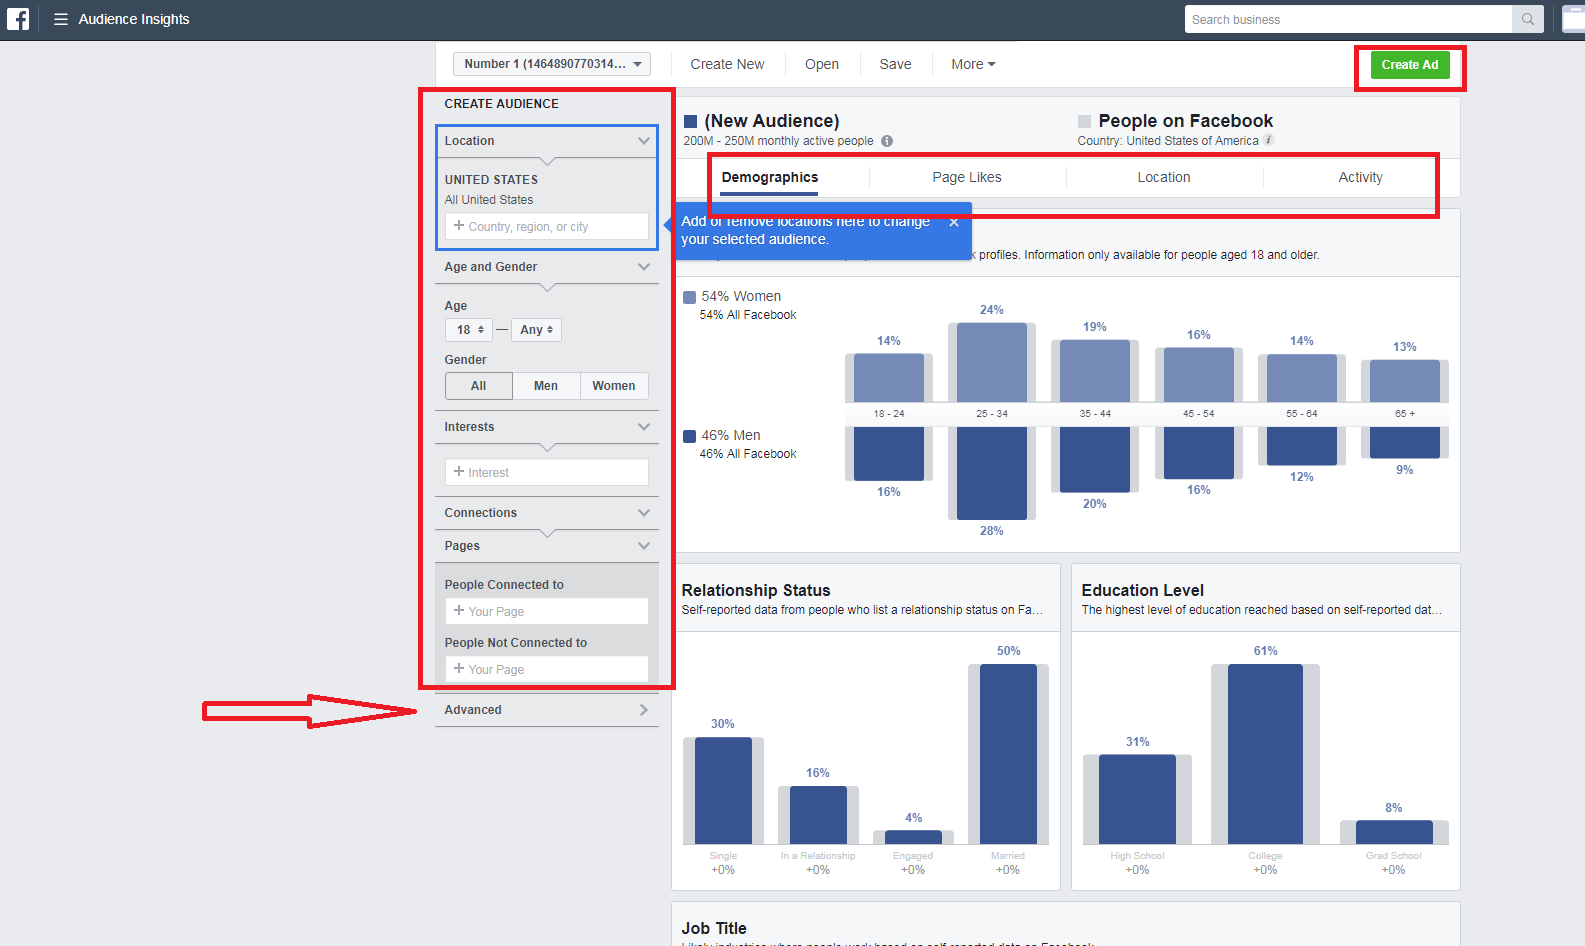
 Note: Facebook collects information only from users’ profiles and information only available for people aged 18 or older.
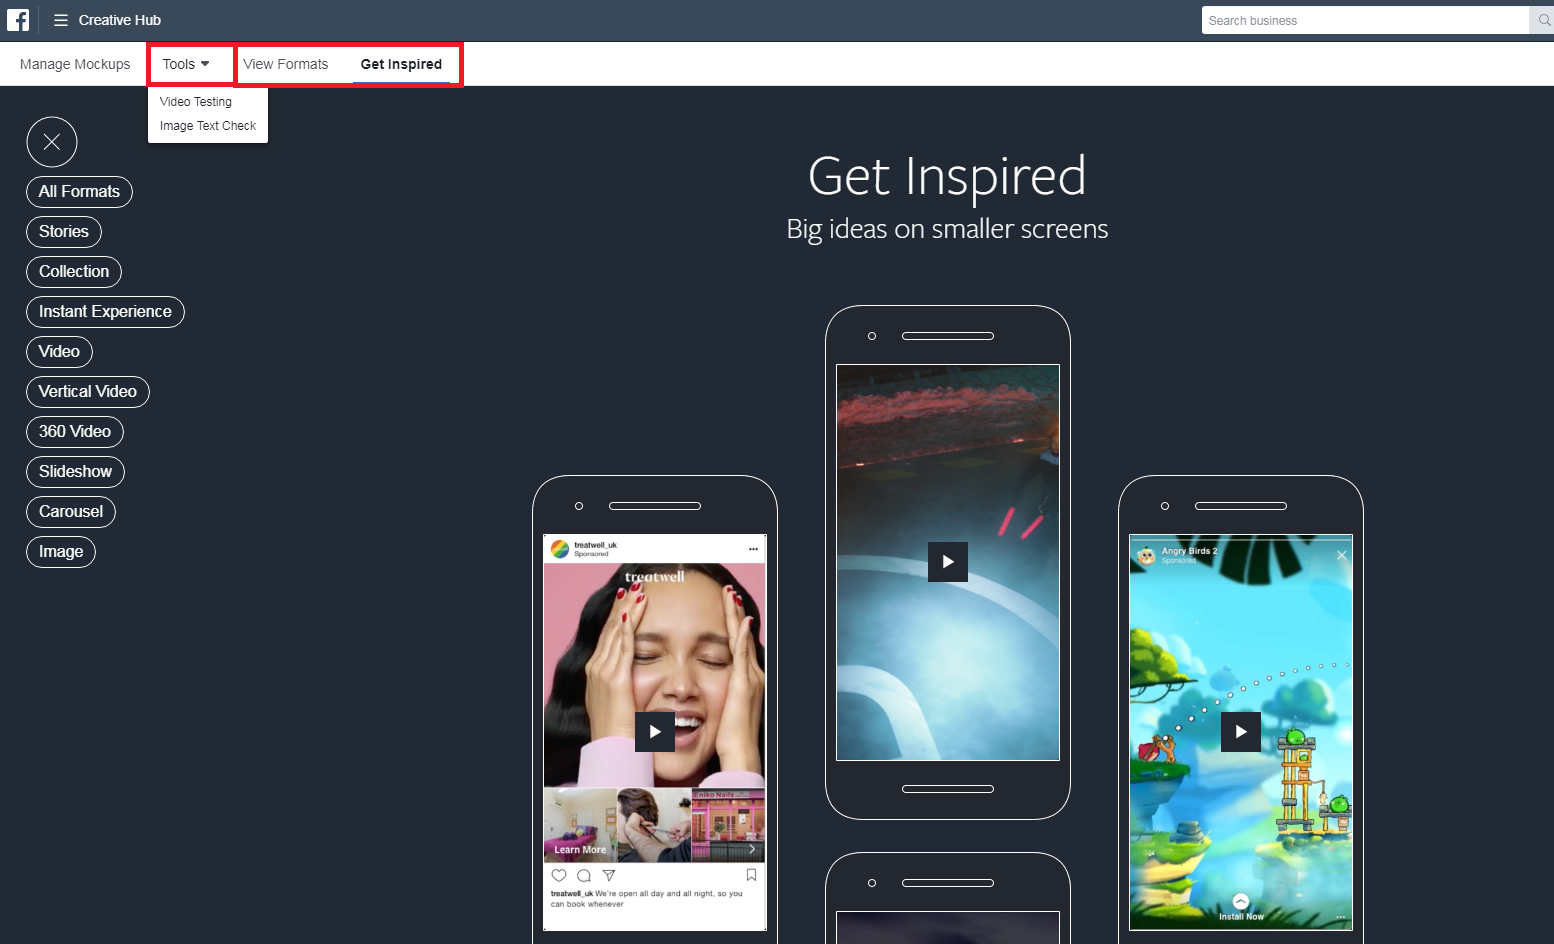
Creative Hub. You can find Creative Hub under the tab “Audience insights”. Creative Hub section where you can get inspired for creating new ads — Facebook shares the best examples of different formats: videos, images, carousels, slideshows, vertical videos, etc. After getting inspired, you can create a mockup by yourself with the help of Facebook recommendations. Besides, you are able to test the created images to check if there is too much text and your ad’s reach may be lowered, you can test videos as well.
We have examined the process of setting up Business Manager and adjusting all necessary parameters: creating an ad account, adding a page and creating a payment method. Now we are ready to create Facebook Ads, so in the next article, we will review how to create a campaign, ad sets, and ads. We will also examine the tabs which we will need for setting the targeted audience and evaluating the outcome of ads.


Great
Legal gostei vou tentar por em pratica!
I’m going to do promotional campaigns through social media and other platforms